NTP / SSH 服务器
NTP 服务器
配置 NTP 服务器
安装 Chrony 以配置 NTP 服务器以进行时间同步。
[1] 安装和配置 Chrony
[root@dlp ~]# dnf -y install chrony
[root@dlp ~]# vi /etc/chrony.conf
# line 3: change servers to synchronize (replace to your own timezone NTP server)
# need NTP server itself to sync time with other NTP server
#pool 2.centos.pool.ntp.org iburst
pool ntp.nict.jp iburst
# line 27: add network range to allow to receive time synchronization requests from NTP Clients
# specify your local network and so on
# if not specified, only localhost is allowed
allow 10.0.0.0/24
[root@dlp ~]# systemctl enable --now chronyd
[2] 如果 Firewalld 正在运行,请允许 NTP 服务。NTP 使用 [123/UDP]
[root@dlp ~]# firewall-cmd --add-service=ntp
success
[root@dlp ~]# firewall-cmd --runtime-to-permanent
success
[3] 验证它是否正常工作
[root@dlp ~]# chronyc sources
MS Name/IP address         Stratum Poll Reach LastRx Last sample
===============================================================================
^+ ntp-a3.nict.go.jp             1   6    17     3   +171us[ +843us] +/- 8339us
^* ntp-a2.nict.go.jp             1   6    17     4   +304us[ +976us] +/- 8983us
^+ ntp-b3.nict.go.jp             1   6    17     4  -2654us[-1982us] +/-   11ms
^- ntp-b2.nict.go.jp             1   6    17     3  -1036us[-1036us] +/- 9465us
配置 NTP 客户端
[1] 客户端配置与服务器端的配置大体相同,
但NTP客户端不需要接收其他主机的时间同步请求,所以不需要指定[allow ***]行。
[root@node01 ~]# dnf -y install chrony
[root@node01 ~]# vi /etc/chrony.conf
# line 3: change to your own NTP server or others in your timezone
#pool 2.centos.pool.ntp.org iburst
pool dlp.srv.world iburst
[root@node01 ~]# systemctl enable --now chronyd
# verify status
[root@node01 ~]# chronyc sources
MS Name/IP address         Stratum Poll Reach LastRx Last sample
===============================================================================
^* dlp.srv.world                 2   6    17    11    +19us[+8744ns] +/-   29ms
[2] 要安装 NTPStat,可以显示时间同步状态
root@node01 ~]# dnf -y install ntpstat
[root@node01 ~]# ntpstat
synchronised to NTP server (10.0.0.30) at stratum 3
   time correct to within 29 ms
   polling server every 64 s
SSH服务器
OpenSSH:密码验证
配置 SSH 服务器以从远程计算机操作服务器。
[1] 即使您使用 Minimal Install 安装了 Fedora,OpenSSH 也已默认安装,因此不需要安装新软件包。您可以默认使用密码验证登录。
root@dlp ~]# systemctl status sshd
*  sshd.service - OpenSSH server daemon
     Loaded: loaded (/usr/lib/systemd/system/sshd.service; enabled; vendor pres>
     Active: active (running) since Thu 2021-11-04 09:40:43 JST; 3h 38min ago
       Docs: man:sshd(8)
             man:sshd_config(5)
   Main PID: 770 (sshd)
      Tasks: 1 (limit: 4649)
     Memory: 2.5M
        CPU: 12ms
     CGroup: /system.slice/sshd.service
             +-- 770 "sshd: /usr/sbin/sshd -D [listener] 0 of 10-100 startups"
.....
.....
[2]如果 Firewalld 正在运行,请允许 SSH 服务。SSH 使用 [22/TCP]。(一般默认允许)
[root@dlp ~]# firewall-cmd --add-service=ssh
success
[root@dlp ~]# firewall-cmd --runtime-to-permanent
success
SSH 客户端:Fedora
为 Fedora 配置 SSH 客户端。
[3] 安装 SSH 客户端。
[root@client ~]# dnf -y install openssh-clients[4] 使用任何普通用户连接到 SSH 服务器。
# ssh [username@(hostname or IP address)]
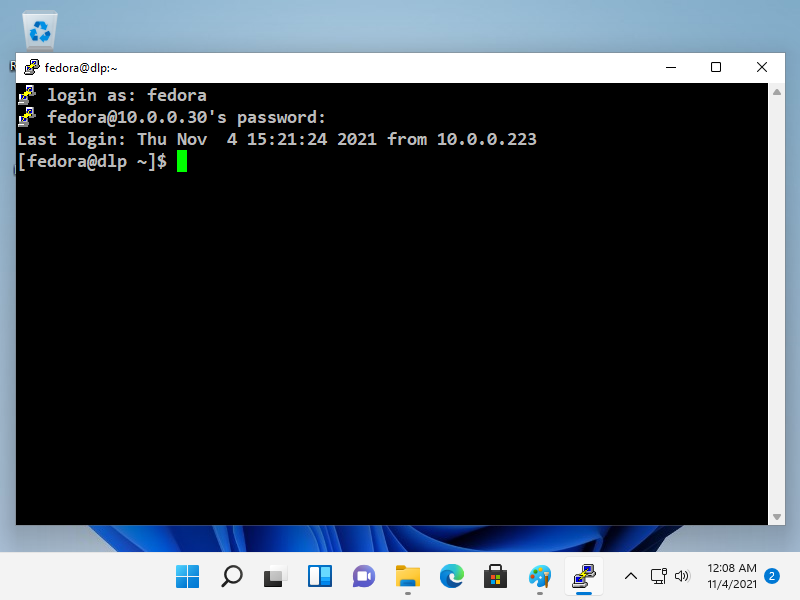
[root@client ~]# ssh fedora@dlp.srv.world
The authenticity of host 'dlp.srv.world (10.0.0.30)' can't be established.
ED25519 key fingerprint is SHA256:gM9dNgDXW8/3Zv6bw1xD3nY1ffRrMZ6ZWZxYpmMn3PQ.
This key is not known by any other names
Are you sure you want to continue connecting (yes/no/[fingerprint])? yes
Warning: Permanently added 'dlp.srv.world' (ED25519) to the list of known hosts.
fedora@dlp.srv.world's password:
Web console: https://dlp.srv.world:9090/ or https://10.0.0.30:9090/
[fedora@dlp ~]$ # logined[5] 可以使用 SSH 在远程主机上执行命令,如下所示。
# for example, run [cat /etc/passwd]
[fedora@client ~]$ ssh fedora@dlp.srv.world "cat /etc/passwd"
fedora@dlp.srv.world's password:
root:x:0:0:root:/root:/bin/bash
bin:x:1:1:bin:/bin:/sbin/nologin
daemon:x:2:2:daemon:/sbin:/sbin/nologin
.....
.....
tcpdump:x:72:72::/:/sbin/nologin
fedora:x:1000:1000::/home/fedora:/bin/bash
clevis:x:990:988:Clevis Decryption Framework unprivileged user:/var/cache/clevis:/usr/sbin/nologin
SSH 客户端:Windows #1
为 Windows 配置 SSH 客户端。此示例在 Windows 11 上。
[6] 下载适用于 Windows 的 SSH 客户端软件。
在此示例中,它显示了 Putty (www.chiark.greenend.org.uk/~sgtatham/putty/)。
安装并启动 Putty,然后在 [Host name] 字段中输入您的服务器的主机名或 IP 地址,然后单击 [Open] 按钮进行连接。
 |
[7] 认证成功后,就可以从远程计算机登录并操作 Fedora 服务器了。
 |
SSH 客户端:Windows #2
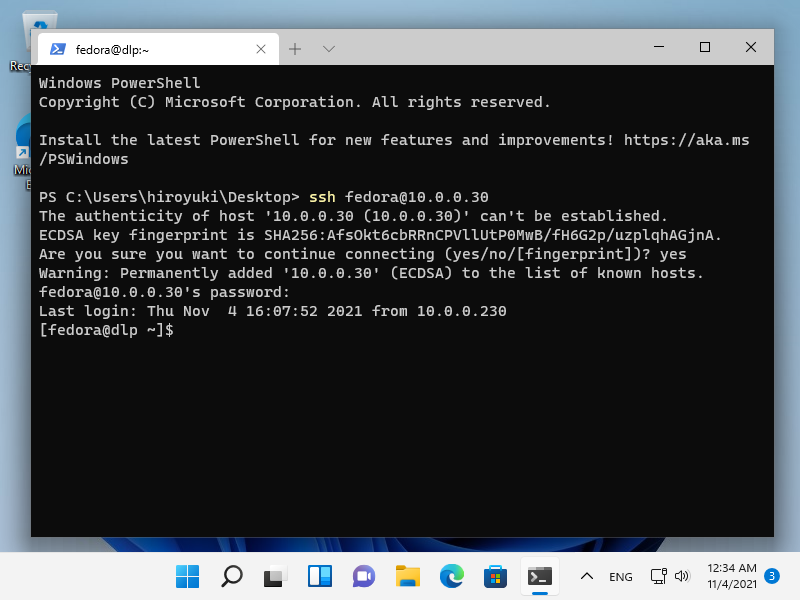
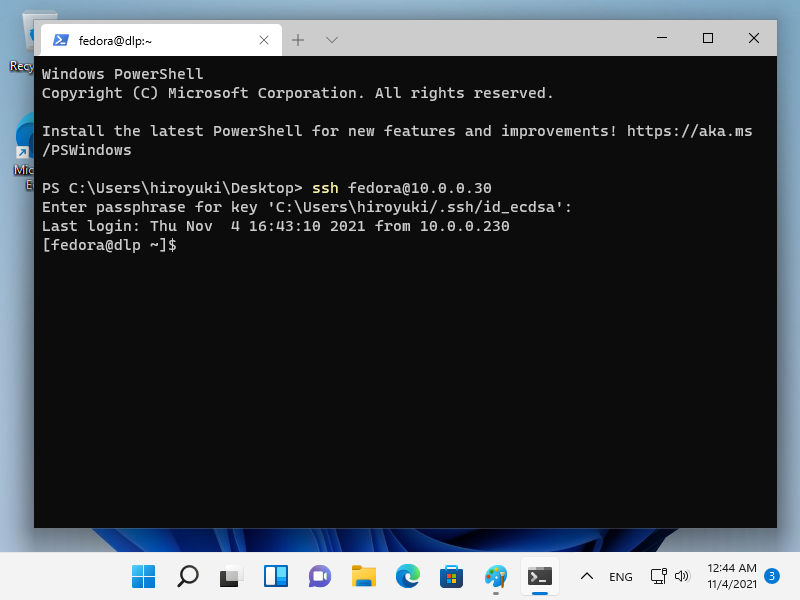
[8] 在 Windows 11 上,OpenSSH 客户端已作为 Windows 功能实现,
因此可以在没有 Putty 或其他 3rd 方 SSH 软件的情况下在 PowerShell 或命令提示符上使用 [ssh] 命令。
用法相同,因为它是 OpenSSH 客户端,请参阅 [4]、[5] 部分。
 |
OpenSSH : SSH 文件传输 (Fedora)
可以通过 SSH 传输文件。
[1] 这是使用 SCP (Secure Copy) 的例子。
# command ⇒scp [Option] Source Target
# copy the [test.txt] on localhost to remote host [node01.srv.world]
[fedora@dlp ~]$ scp ./test.txt fedora@node01.srv.world:~/
fedora@node01.srv.world's password:     # password of the user
test.txt                                      100%   10     0.0KB/s   00:00

# copy the [/home/fedora/test.txt] on remote host [node01.srv.world] to the localhost
[fedora@dlp ~]$ scp fedora@node01.srv.world:/home/fedora/test.txt ./test.txt
fedora@node01.srv.world's password:
test.txt                                      100%   10     0.0KB/s   00:00
[2] 这是使用 SFTP(SSH 文件传输协议)的示例。SFTP 服务器功能默认开启,
如果没有开启,在 [/etc/ssh/sshd_config] 中添加 [Subsystem sftp /usr/libexec/openssh/sftp-server] 行。
# sftp [Option] [user@host]
[redhat@dlp ~]$ sftp fedora@node01.srv.world
fedora@node01.srv.world's password:    # password of the user
Connected to node01.srv.world.
sftp>

# show current directory on remote host
sftp> pwd
Remote working directory: /home/fedora

# show current directory on localhost
sftp> !pwd
/home/redhat

# show files in current directory on remote host
sftp> ls -l
drwxrwxr-x    2 fedora     fedora            7 Nov 04 21:33 public_html
-rw-rw-r--    1 fedora     fedora           10 Nov 04 22:53 test.txt

# show files in current directory on localhost
sftp> !ls -l
total 4
-rw-rw-r--    1 redhat     redhat           10 Nov 04 21:53 test.txt

# change directory
sftp> cd public_html
sftp> pwd
Remote working directory: /home/fedora/public_html

# upload a file to remote host
sftp> put test.txt redhat.txt
Uploading test.txt to /home/fedora/redhat.txt
test.txt                           100%   10     0.0KB/s   00:00
sftp> ls -l
drwxrwxr-x    2 fedora     fedora            6 Nov 04 21:33 public_html
-rw-rw-r--    1 fedora     fedora           10 Nov 04 21:39 redhat.txt
-rw-rw-r--    1 fedora     fedora           10 Nov 04 22:53 test.txt

# upload some files to remote host
sftp> put *.txt
Uploading test.txt to /home/fedora/test.txt
test.txt                                           100%   10     0.0KB/s   00:00
Uploading test2.txt to /home/fedora/test2.txt
test2.txt                                          100%    0     0.0KB/s   00:00
sftp> ls -l
drwxrwxr-x    2 fedora     fedora            6 Nov 04 21:33 public_html
-rw-rw-r--    1 fedora     fedora           10 Nov 04 21:39 redhat.txt
-rw-rw-r--    1 fedora     fedora           10 Nov 04 21:45 test.txt
-rw-rw-r--    1 fedora     fedora           10 Nov 04 21:46 test2.txt

# download a file from remote host
sftp> get test.txt
Fetching /home/fedora/test.txt to test.txt
/home/fedora/test.txt                   100%   10     0.0KB/s   00:00

# download some files from remote host
sftp> get *.txt
Fetching /home/fedora/fedora.txt to fedora.txt
/home/fedora/fedora.txt                                       100%   10     0.0KB/s   00:00
Fetching /home/fedora/test.txt to test.txt
/home/fedora/test.txt                                         100%   10     0.0KB/s   00:00
Fetching /home/fedora/test2.txt to test2.txt
/home/fedora/test2.txt                                        100%   10     0.0KB/s   00:00

# create a directory on remote host
sftp> mkdir testdir
sftp> ls -l
drwxrwxr-x    2 fedora     fedora            6 Nov 04 21:33 public_html
-rw-rw-r--    1 fedora     fedora           10 Nov 04 21:39 redhat.txt
-rw-rw-r--    1 fedora     fedora           10 Nov 04 21:45 test.txt
-rw-rw-r--    1 fedora     fedora           10 Nov 04 21:46 test2.txt
drwxrwxr-x    2 fedora     fedora            6 Nov 04 21:53 testdir

# delete a directory on remote host
sftp> rmdir testdir
rmdir ok, `testdir' removed
sftp> ls -l
drwxrwxr-x    2 fedora     fedora            6 Nov 04 21:33 public_html
-rw-rw-r--    1 fedora     fedora           10 Nov 04 21:39 redhat.txt
-rw-rw-r--    1 fedora     fedora           10 Nov 04 21:45 test.txt
-rw-rw-r--    1 fedora     fedora           10 Nov 04 21:46 test2.txt

# delete a file on remote host
sftp> rm test2.txt
Removing /home/fedora/test2.txt
sftp> ls -l
drwxrwxr-x    2 fedora     fedora            6 Nov 04 21:33 public_html
-rw-rw-r--    1 fedora     fedora           10 Nov 04 21:39 redhat.txt
-rw-rw-r--    1 fedora     fedora           10 Nov 04 Nov 04 21:45 test.txt

# execute commands with ![command]
sftp> !cat /etc/passwd
root:x:0:0:root:/root:/bin/bash
bin:x:1:1:bin:/bin:/sbin/nologin
.....
.....
redhat:x:1001:1001::/home/redhat:/bin/bash

# exit
sftp> quit
221 Goodbye.
OpenSSH : SSH 文件传输 (Windows)
可以在 Windows 客户端上通过 SSH 传输文件。
在此示例中,它显示了 WinSCP (winscp.net/eng/download.php)。
在 Windows 11 上,OpenSSH 客户端已作为 Windows 功能实现,
因此可以使用 [scp]、[sftp] 命令,如此处的示例。
[1] 安装并启动 WinSCP,然后显示以下窗口。
输入主机名、用户名、用户密码,然后点击【登录】按钮。
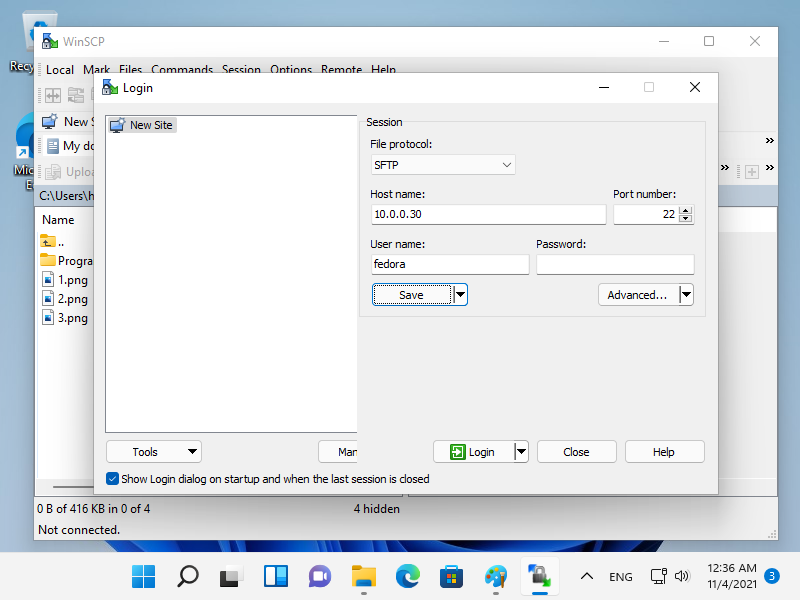
[2] 成功通过认证后,就可以在 WinSCP 上通过 SSH 传输文件了。

OpenSSH:SSH 密钥对认证
配置 SSH 服务器以使用密钥对身份验证登录。
为客户端创建一个私钥,为服务器创建一个公钥。
[1] 由每个用户创建密钥对,因此在 SSH 服务器主机上使用普通用户登录并按如下方式工作。
# create key-pair
[fedora@dlp ~]$ ssh-keygen -t ecdsa
Generating public/private ecdsa key pair.
Enter file in which to save the key (/home/fedora/.ssh/id_ecdsa): # Enter or input changes if you want
Created directory '/home/fedora/.ssh'.
Enter passphrase (empty for no passphrase): # set passphrase (if set no passphrase, Enter with empty)
Enter same passphrase again:
Your identification has been saved in /home/fedora/.ssh/id_ecdsa
Your public key has been saved in /home/fedora/.ssh/id_ecdsa.pub
The key fingerprint is:
SHA256:eZV3AxI39NqZglzADa/51KFMR3wyvbMlBhkQrZTymNI fedora@dlp.srv.world
The key's randomart image is:
.....
.....

[fedora@dlp ~]$ ll ~/.ssh
total 8
-rw-------. 1 fedora fedora 557 Nov  4 14:54 id_ecdsa
-rw-r--r--. 1 fedora fedora 182 Nov  4 14:54 id_ecdsa.pub

[fedora@dlp ~]$ mv ~/.ssh/id_ecdsa.pub ~/.ssh/authorized_keys
[2] 将在服务器上创建的私钥传输到客户端,然后可以使用密钥对身份验证登录。
[fedora@node01 ~]$ mkdir ~/.ssh
[fedora@node01 ~]$ chmod 700 ~/.ssh
# transfer the private key to the local ssh directory
[fedora@node01 ~]$ scp fedora@dlp.srv.world:/home/fedora/.ssh/id_ecdsa ~/.ssh/
fedora@dlp.srv.world's password:
id_ecdsa                                      100% 2655     2.2MB/s   00:00

[fedora@node01 ~]$ ssh fedora@dlp.srv.world
Enter passphrase for key '/home/fedora/.ssh/id_ecdsa':   # passphrase if you set
Last login: Thu Apr 28 19:49:52 2021
[fedora@dlp ~]$   # logined
[3] 如果设置[PasswordAuthentication no],则更安全。
[root@dlp ~]# vi /etc/ssh/sshd_config
# line 65 : uncomment and change to [no]
PasswordAuthentication no
[root@dlp ~]# systemctl restart sshd
Windows 客户端 #1 上的 SSH 密钥对身份验证
这是从 Windows 客户端登录 SSH 服务器的示例。
它在这个例子中使用了 Putty。
在此之前,将私钥传输到 Windows 客户端。
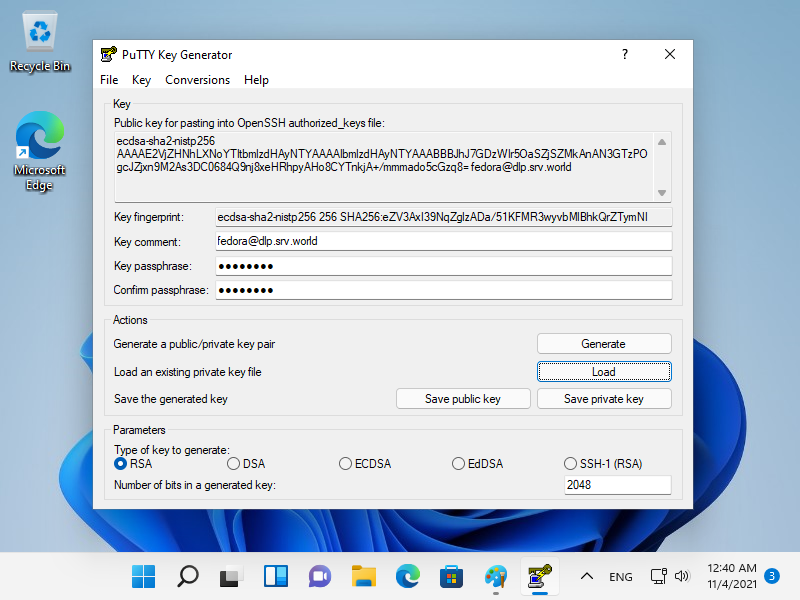
[4] 运行 [Putty] 中包含的 [Puttygen.exe]。(放置在文件夹[Putty.exe]也放置)
如果不包含,从官方网站(www.chiark.greenend.org.uk/~sgtatham/putty/)下载。
启动 [Puttygen.exe] 后,单击以下窗口中的 [Load] 按钮。
 |
[5] 指定您从 SSH 服务器传输的私钥,然后需要密码,如下所示,回答它。(如果没有设置密码,则跳过此步骤)
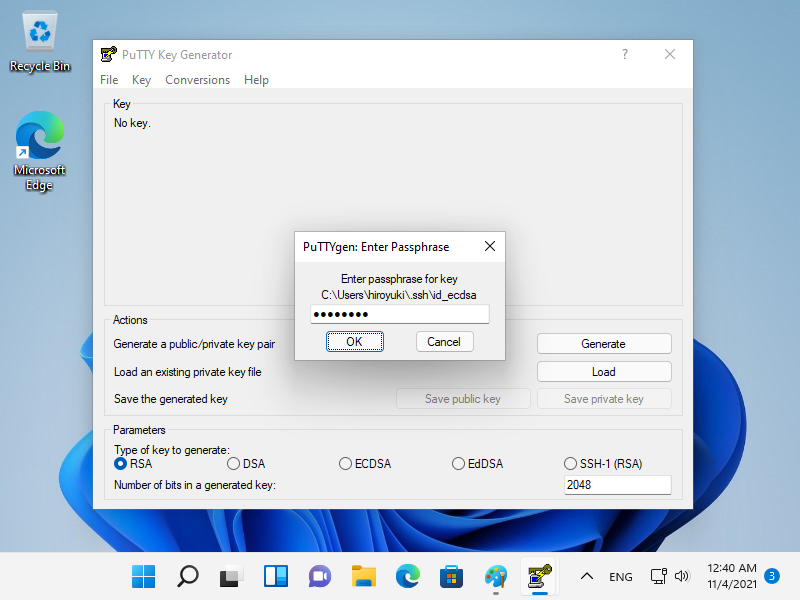 |
[6] 单击[保存私钥]按钮,将其保存在您喜欢的文件夹下,使用您喜欢的任何文件名。
 |
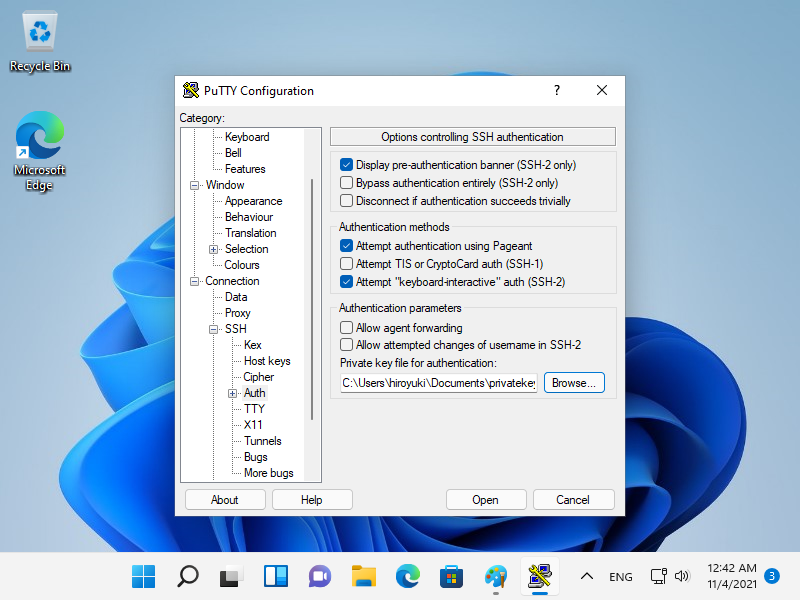
[7] 启动 Putty 并打开左侧窗格中的 [Connection] - [SSH] - [Auth],然后在 [Private key file] 字段中指定您的私钥。
 |
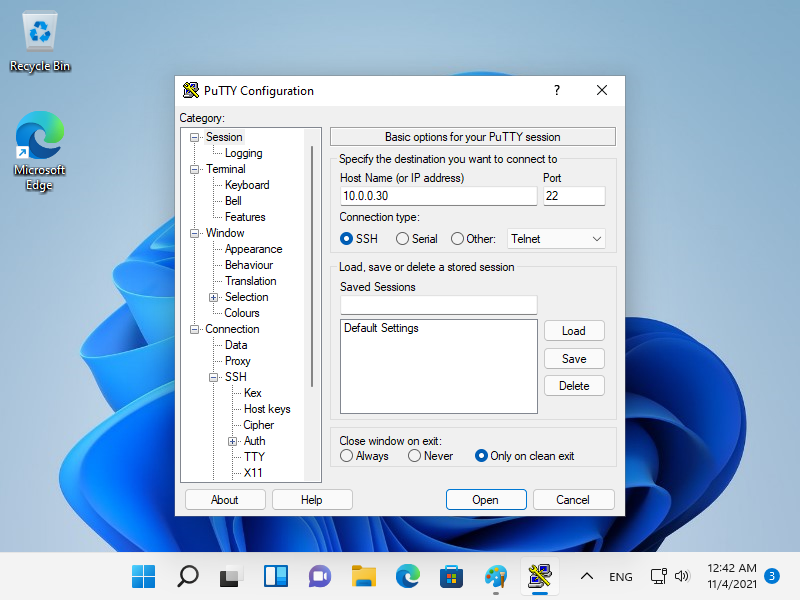
[8] 返回左侧窗格中的 [Session] 并指定要连接的 SSH 服务器主机。
 |
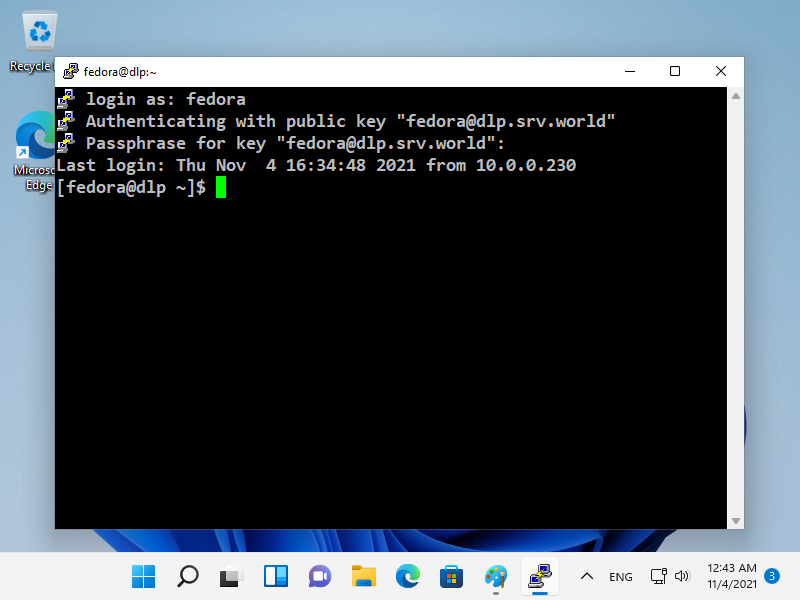
[9] 设置 SSH 密钥对时,如果设置了密码,则需要如下所示登录,然后回答。
 |
Windows #2 上的 SSH 密钥对身份验证
[10] 在 Windows 11 上,OpenSSH 客户端已作为 Windows 功能实现,
因此可以在没有 Putty 和其他 3rd 方软件的情况下使用 SSH 密钥对进行身份验证。
将您的私钥传输到您的 Windows 10 并将其放在 [(logon user home).ssh] 文件夹下,如下所示,然后就可以使用密钥对身份 验证了。
 |
OpenSSH:仅 SFTP + Chroot
仅配置 SFTP + Chroot。
一些应用此设置的用户只能使用 SFTP 访问,并且还应用了 chroot 目录。
[1] 例如,将 [/home] 设置为 Chroot 目录。
# create a group for SFTP only
[root@dlp ~]# groupadd sftp_users
# for example, set [fedora] user as SFTP only user
[root@dlp ~]# usermod -aG sftp_users fedora
[root@dlp ~]# vi /etc/ssh/sshd_config
# line 123 : comment out and add a line
#Subsystem      sftp    /usr/libexec/openssh/sftp-server
Subsystem       sftp    internal-sftp

# add to the end
Match Group sftp_users
  X11Forwarding no
  AllowTcpForwarding no
  ChrootDirectory /home
  ForceCommand internal-sftp
[root@dlp ~]# systemctl restart sshd[fedora@node01 ~]$ ssh dlp.srv.world
fedora@dlp.srv.world's password:
This service allows sftp connections only.
Connection to dlp.srv.world closed. # denied normally
[fedora@node01 ~]$ sftp dlp.srv.world
fedora@dlp.srv.world's password:
Connected to dlp.srv.world.
sftp> ls -l
drwx------ 3 1000 1000 95 Nov 4 05:54 fedora
drwx------ 2 1001 1001 83 Nov 3 23:43 redhat
sftp> pwd
Remote working directory: /
sftp> exit
OpenSSH:使用 SSH 代理
使用 SSH-Agent 自动输入 SSH 密钥对认证的密码。
[1]这是使用 SSH-Agent 的一些示例。
# run SSH-Agent
[fedora@node01 ~]$ eval $(ssh-agent)
Agent pid 1389
# add passphrase
[fedora@node01 ~]$ ssh-add
Enter passphrase for /home/fedora/.ssh/id_ecdsa:
Identity added: /home/fedora/.ssh/id_ecdsa (fedora@dlp.srv.world)
# confirm
[fedora@node01 ~]$ ssh-add -l
256 SHA256:eZV3AxI39NqZglzADa/51KFMR3wyvbMlBhkQrZTymNI fedora@dlp.srv.world (ECDSA)
# verify to conenct without inputting passphrase
[fedora@node01 ~]$ ssh dlp.srv.world hostname
dlp.srv.world
# stop SSH-Agent
# if not execute it, SSH-Agent process remains even if you logout System, be careful
[fedora@node01 ~]$ eval $(ssh-agent -k)
Agent pid 1389 killed