Fedora 35:下载 2021/11/03 |
| \[1\] | 从以下站点下载 Fedora 35(2021 年 11 月 2 日发布)。 ```
⇒ http://download.fedoraproject.org/pub/fedora/linux/releases/35/Server/x86_64/iso/
```
|
为 Fedora 35 创建安装盘 |
下载 Fedora 35 的 ISO 后,使用刻录应用程序将其刻录到 DVD 以创建安装盘。
如果您使用 Windows 8/10 的功能创建它,请参阅以下内容。 | |
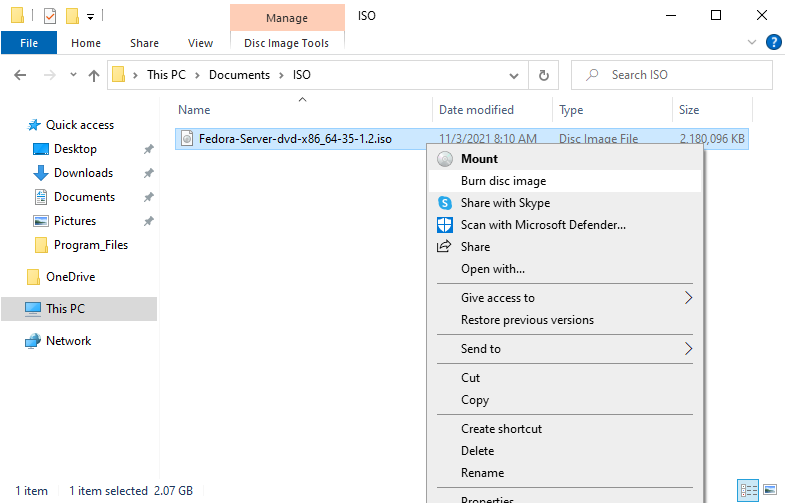
| \[2\] | 在 DVD 驱动器中插入一个空的 DVD 媒体。接下来,右键单击 Fedora 的 ISO 映像,然后在菜单中选择 \[Burn Disk image\]。 |
|  |
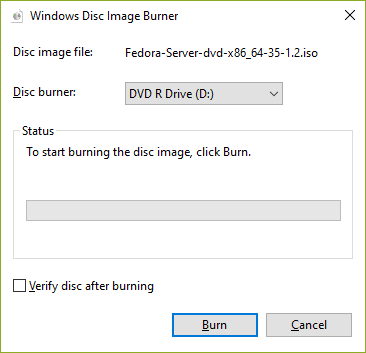
| \[3\] | 单击 \[刻录\] 按钮并开始刻录。 |
|  |
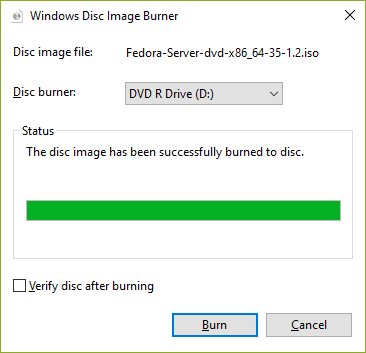
| \[4\] | 完成刻录后,弹出磁盘并[继续安装步骤](https://www.server-world.info/en/note?os=Fedora_35&p=install)。 |
|  |
Fedora 35:安装 2021/11/03 |
| \[1\] | 插入 Fedora 35 安装盘并启动计算机。然后,Fedora 35 安装程序启动并显示以下屏幕。选择您想在安装过程中使用的语言。如果您在下一步中从未更改 \[Language Support\] 设置,此处选择的语言也将设置为默认系统语言。 |
|  |
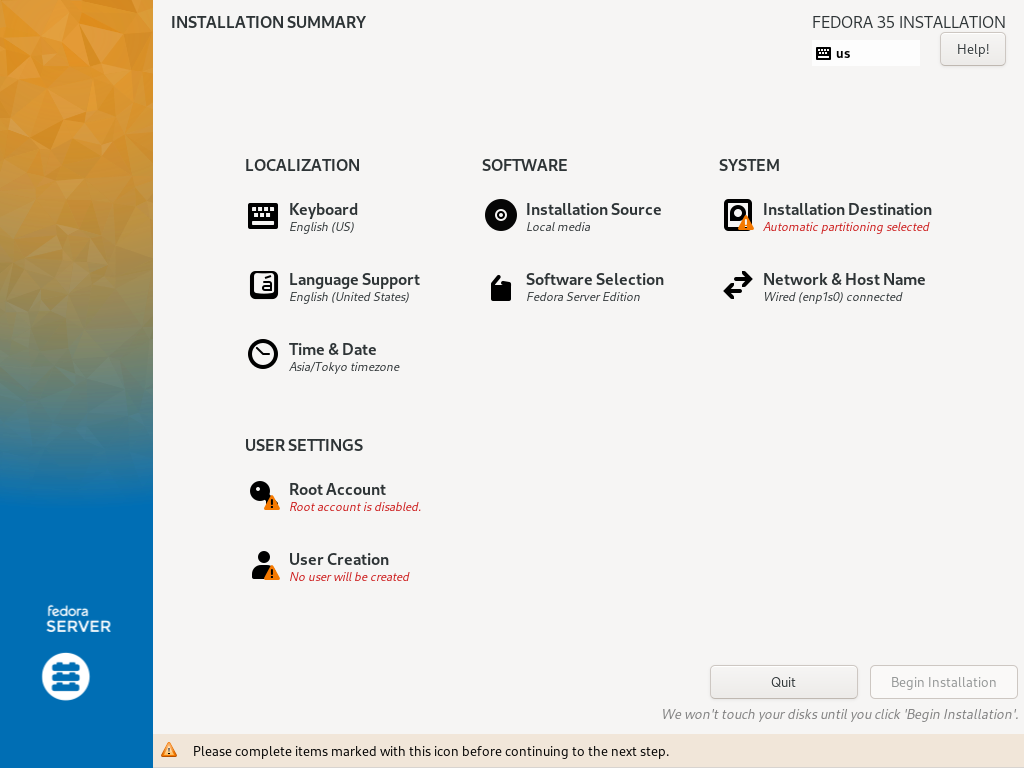
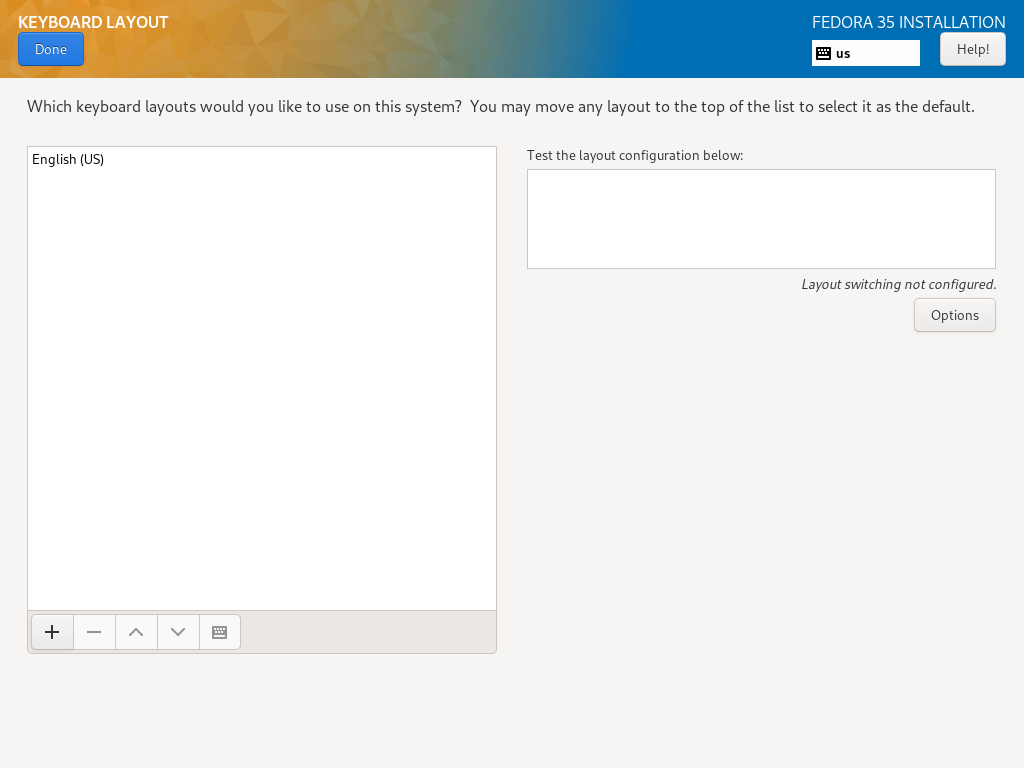
| \[2\] | 这是一些基本配置的默认安装摘要部分。在此示例中,在 \[LOCALIZATION\] 类别上配置键盘映射,单击 \[Keyboard\] 图标。 |
|  |
| \[3\] | 单击左下角的 \[+\] 按钮。 |
|  |
| \[4\] | 在列表中选择您使用的键盘类型,然后单击 \[添加\] 按钮。 |
| 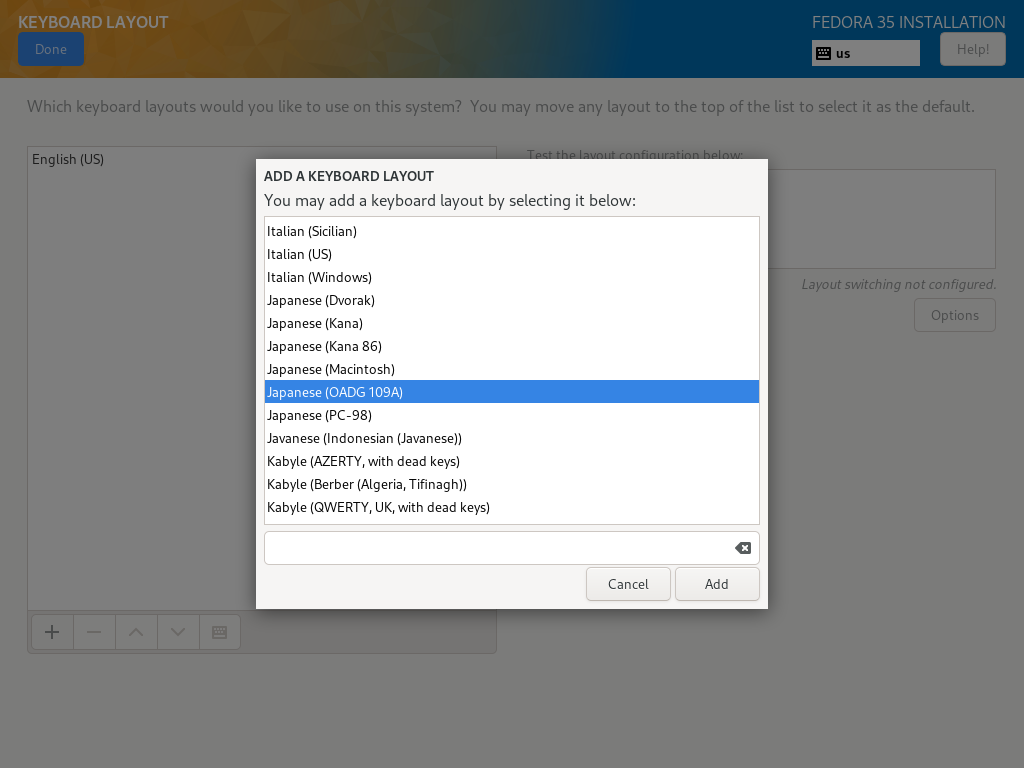 |
| \[5\] | 添加键盘布局后,将您的键盘放在顶部的第一优先级,如下所示,然后单击左上角的\[完成\]按钮完成。 |
|  |
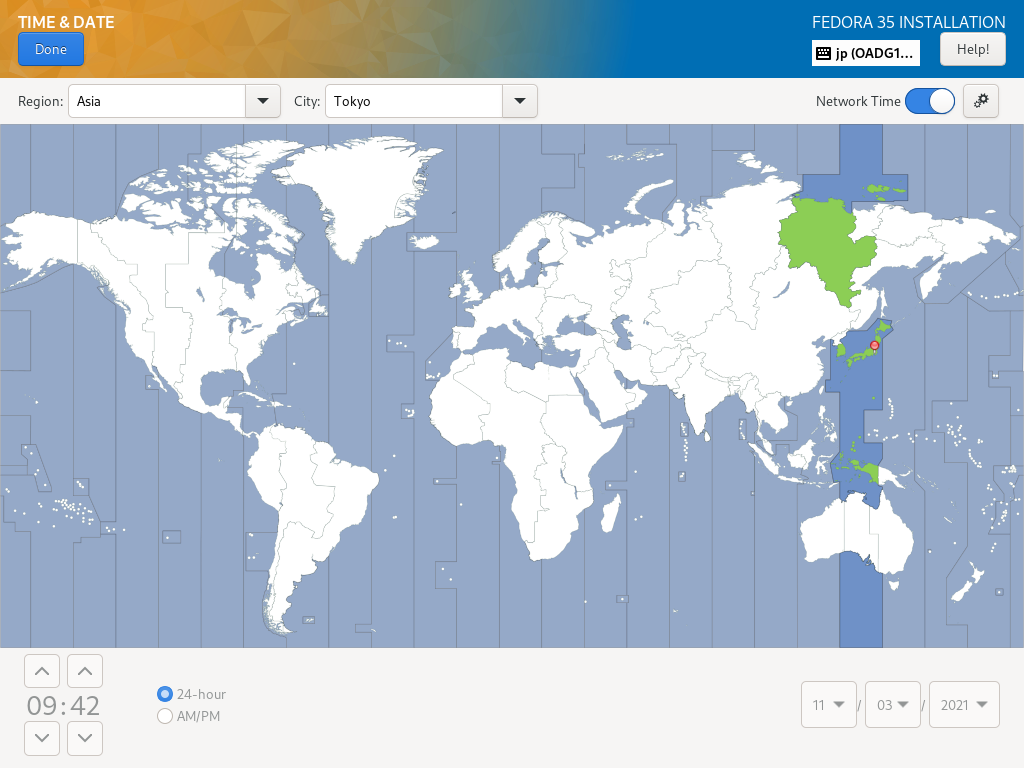
| \[6\] | 返回默认安装摘要部分,如 \[2\],下一步,设置您的时区,单击 \[时间和日期\] 图标。 单击地图上您要设置时区的点,然后按左上角的 \[完成\] 按钮。 |
|  |
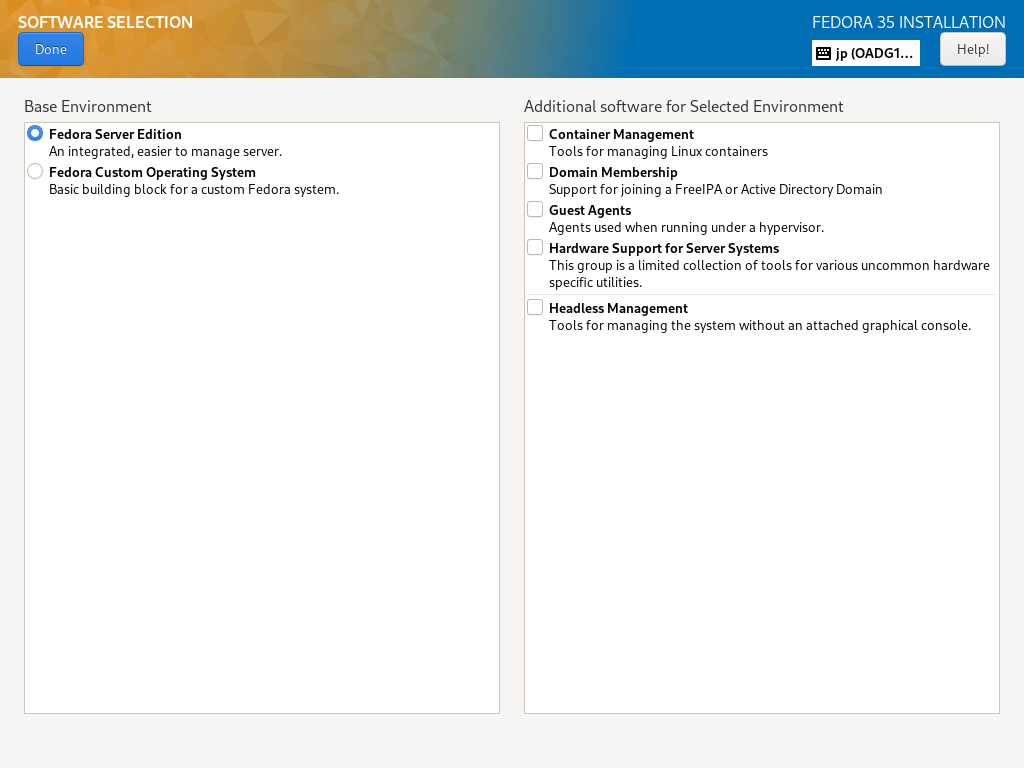
| \[7\] | 回到默认的 Installation Summary 部分,如 \[2\],下一步,单击 \[Software Selection\] 图标安装 Fedora。 在您要安装的列表上选择软件选择。在本例中,它选择 \[Fedora Server Edition\] 选择。 |
|  |
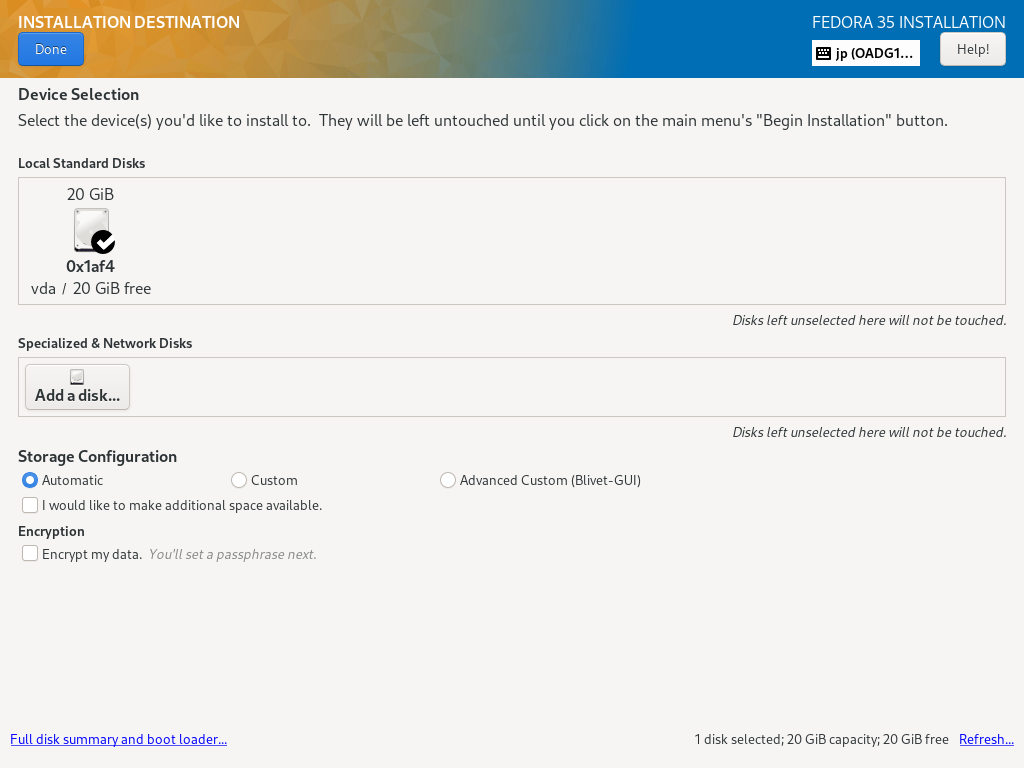
| \[8\] | 回到默认的 Installation Summary 部分,如 \[2\],下一步,单击 \[Installation Destination\] 图标选择您安装 Fedora 的磁盘。 如果您的计算机上连接了某些 HDD,则需要选择安装目标磁盘。 此外,如果您想手动编辑分区布局,请在 \[Storage Configuration\] 部分选择 \[Custom\], 但如果您选择 \[Automatic\],则分区会自动完成。然后分区配置为\[/boot\], \[/\], \[/home\], \[swap\]。 (但如果目标磁盘的大小如下所示,/home 不会分开)。 如果一切都OK,点击左上角的\[Done\]按钮完成磁盘配置。 |
|  |
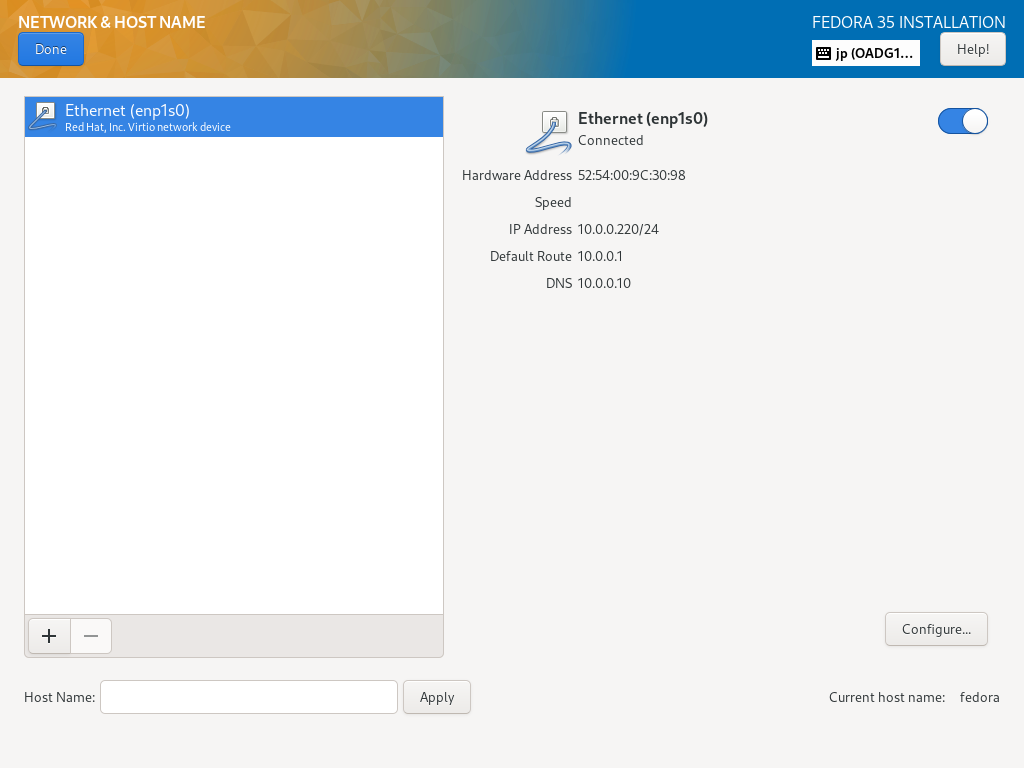
| \[9\] | 返回到默认的安装摘要部分,如 \[2\],下一步,单击 \[网络和主机名\] 图标。 如果您已经有这个新的 Fedora 服务器的主机名,请在 \[主机名\] 字段中输入主机名。 |
|  |
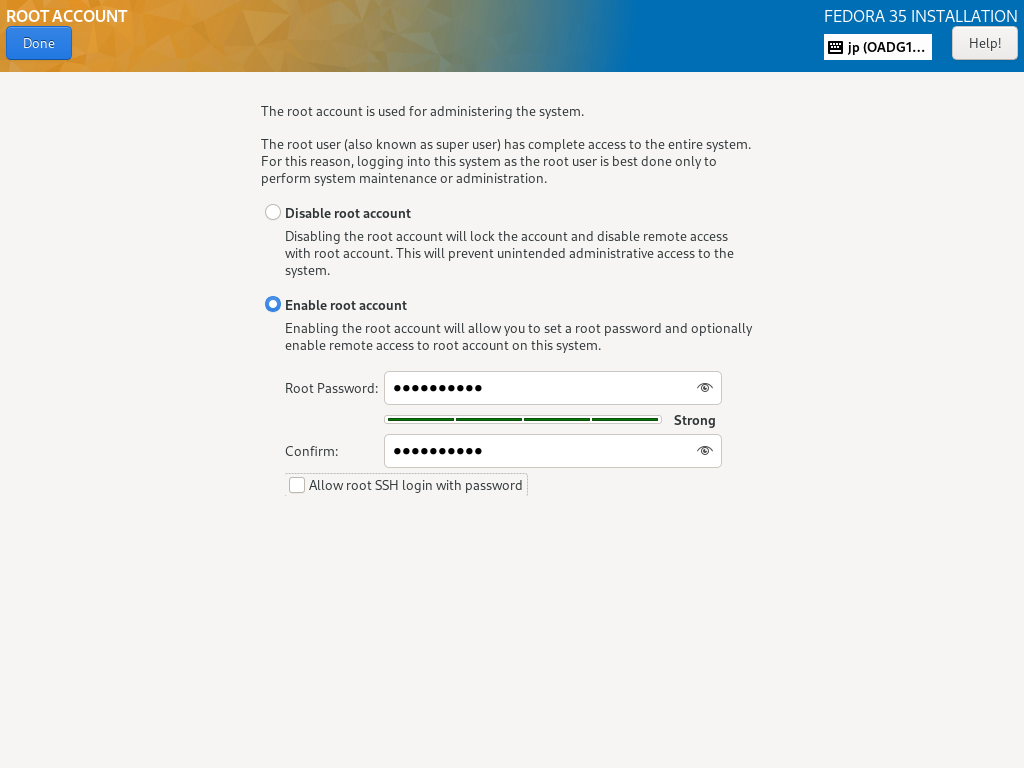
| \[10\] | 返回默认的安装摘要部分,如 \[2\],下一步,单击 \[USER SETTINGS\] 类别下的 \[Root Password\] 图标。 如果启用 root 用户帐户,请选中 \[Enable root account\] 框并设置 root 密码,如下所示。 如果您禁用 root 用户帐户,请选中 \[禁用 root 帐户\] 框。 |
|  |
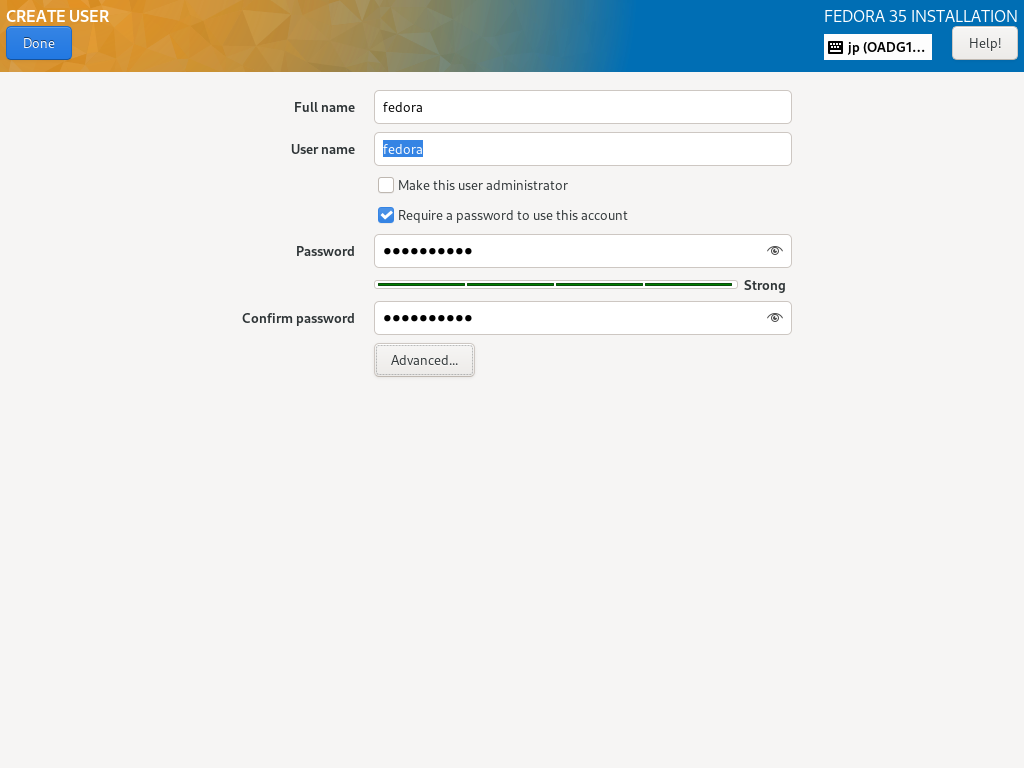
| \[11\] | 返回到默认的安装摘要部分,如 \[2\],下一步,单击 \[用户设置\] 类别下的 \[用户创建\] 图标。 在此处创建一个普通用户帐户。如果您在上一节中禁用了 root 用户帐户,请选中 \[Make this user administrator\] 框以授予此普通帐户的管理权限。 |
|  |
| \[12\] | 确认选择,如果没问题,点击 \[开始安装\] 安装 Fedora。 |
| 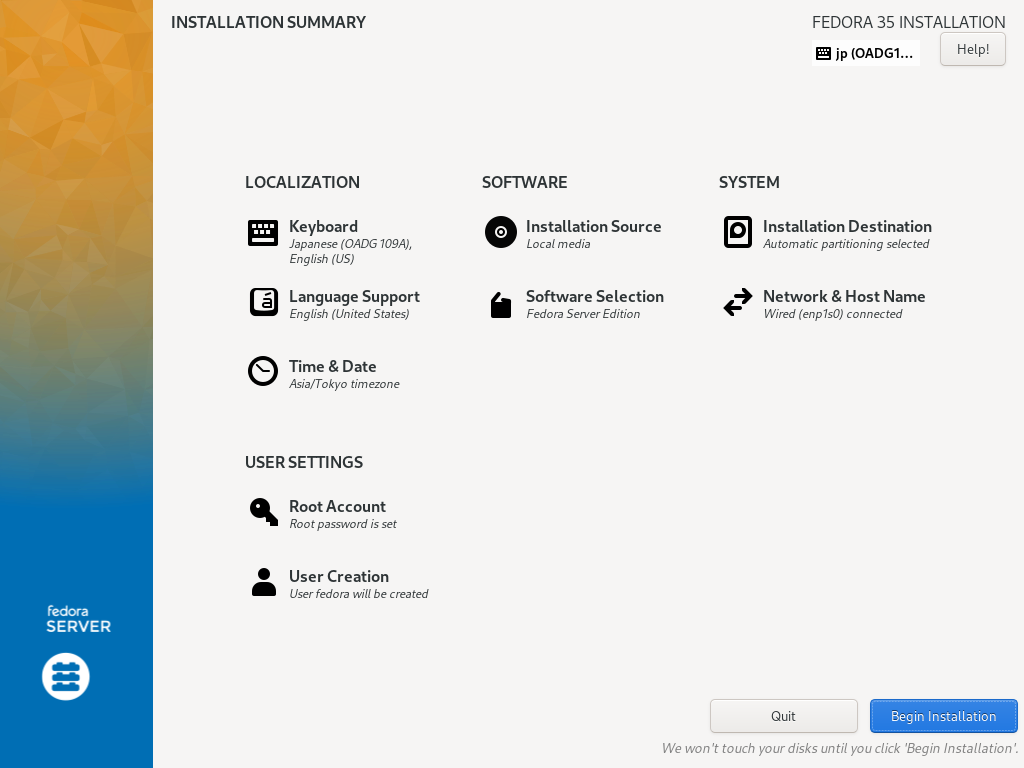 |
| \[13\] | 安装完成后,点击右下角的【重启系统】按钮重启电脑。 |
| 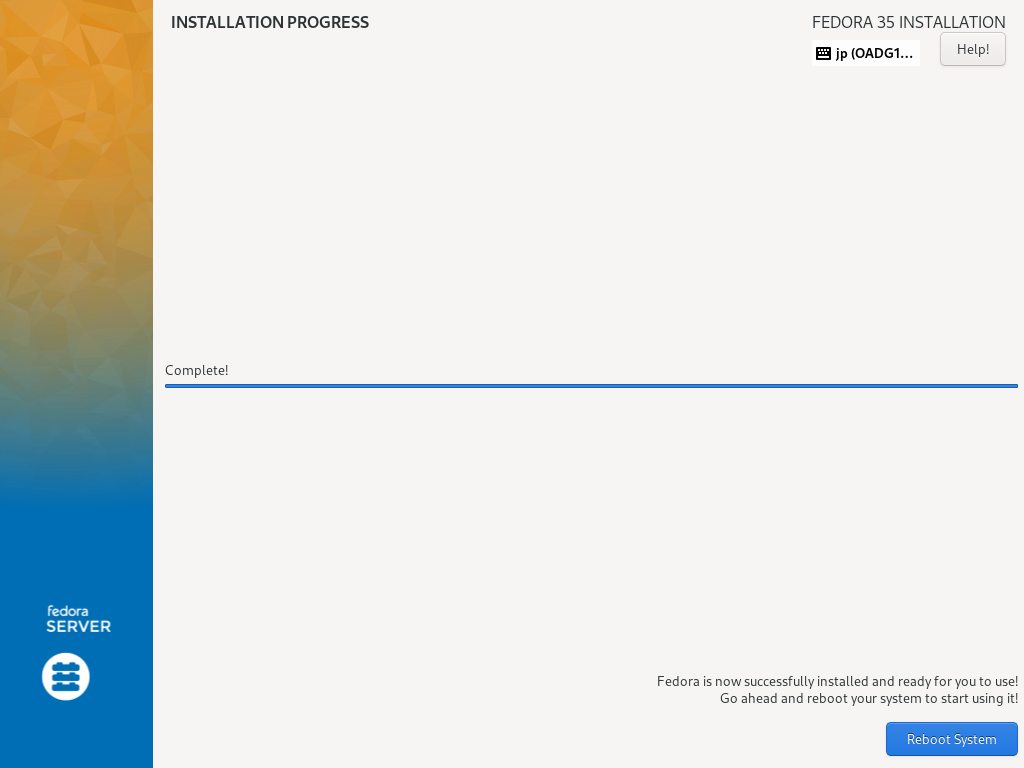 |
| \[14\] | 重新启动计算机后,登录提示如下所示。使用 root 用户或您在安装过程中设置的普通用户登录。如果正常登录,Fedora 35 安装完成。 |
| ``` Fedora Linux 35(服务器版) x86_64 (ttyS0) 上的内核 5.14.10-300.fc35.x86_64 Web 控制台:https://fedora:9090/ 或 https://10.0.0.223:9090/ Fedora 登录: ``` |
要在 Fedora Server 上添加用户帐户,请进行如下配置。 | |
| \[1\] | 例如,添加 \[fedora\] 用户。 |
| \[2\] | 如果您想从上面添加的用户切换到 root 帐户,请使用 \[su\] 命令执行此操作。 |
| \[3\] | 如果你想限制用户运行 \[su\] 命令,配置如下。 在下面的示例中,只有 \[wheel\] 组中的用户可以运行 \[su\] 命令。 |
| \[4\] | 如果您想删除用户帐户,请按如下方式设置。 |
| \[1\] | 从 localhost 或客户端计算机使用 Web 浏览器访问 \[https://(服务器的主机名或 IP 地址):9090/\],然后显示 Cockpit 登录表单如下所示。使用用户登录。此示例使用 root 用户显示,如下所示。 |
| 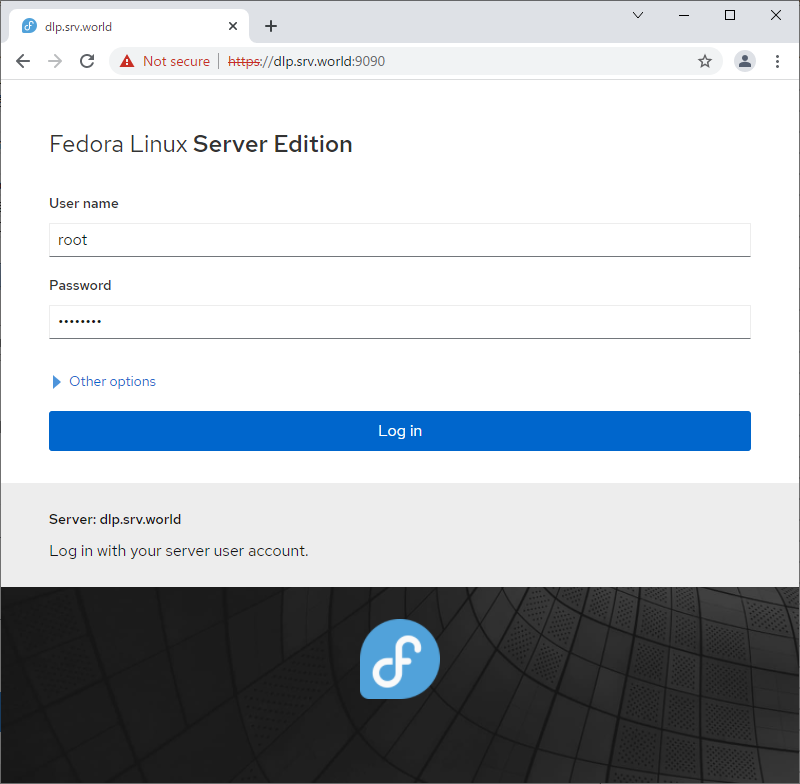 |
| \[2\] | 这是驾驶舱索引页面。可以在这里管理各种系统设置。 |
| 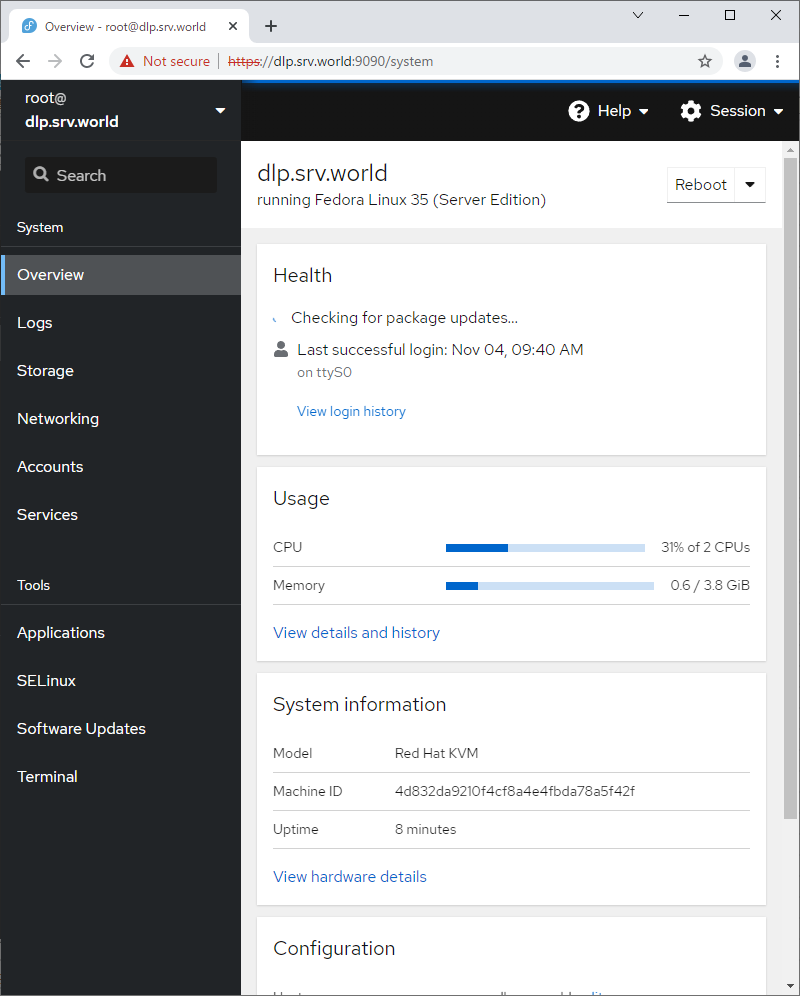 |
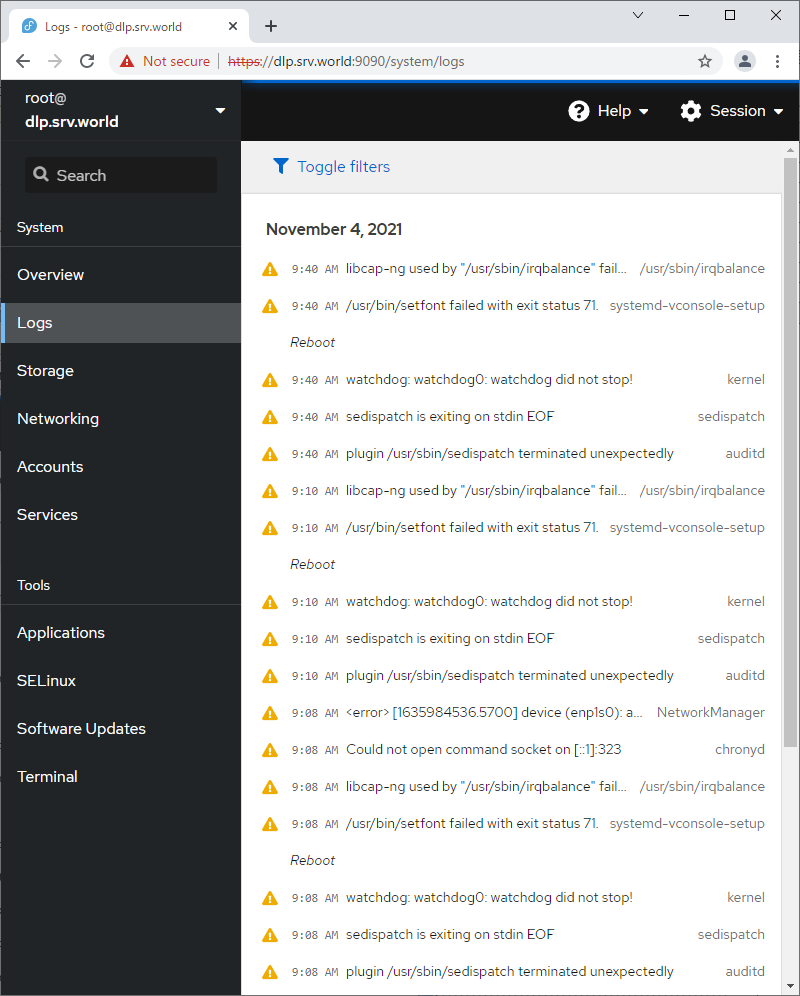
| \[3\] | 对于左侧窗格中的\[日志\],可以管理或操作作为日志管理工具的\[日志\]服务。 |
|  |
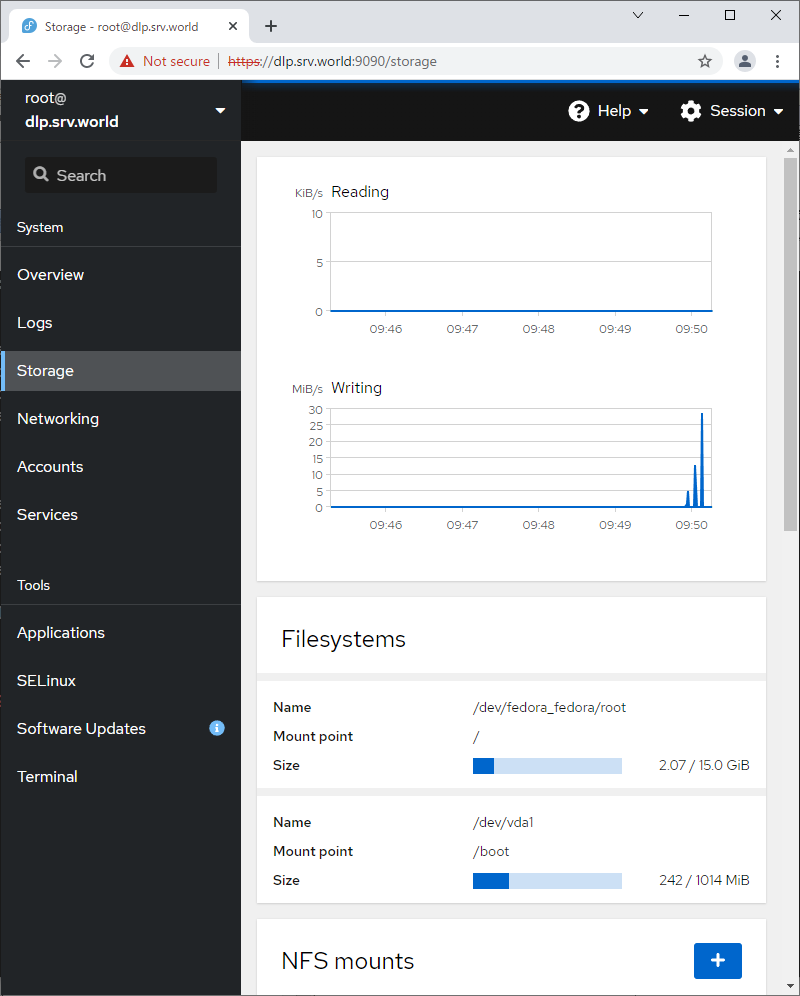
| \[4\] | 左侧窗格中的\[Storage\],可以管理或操作Storage。 |
|  |
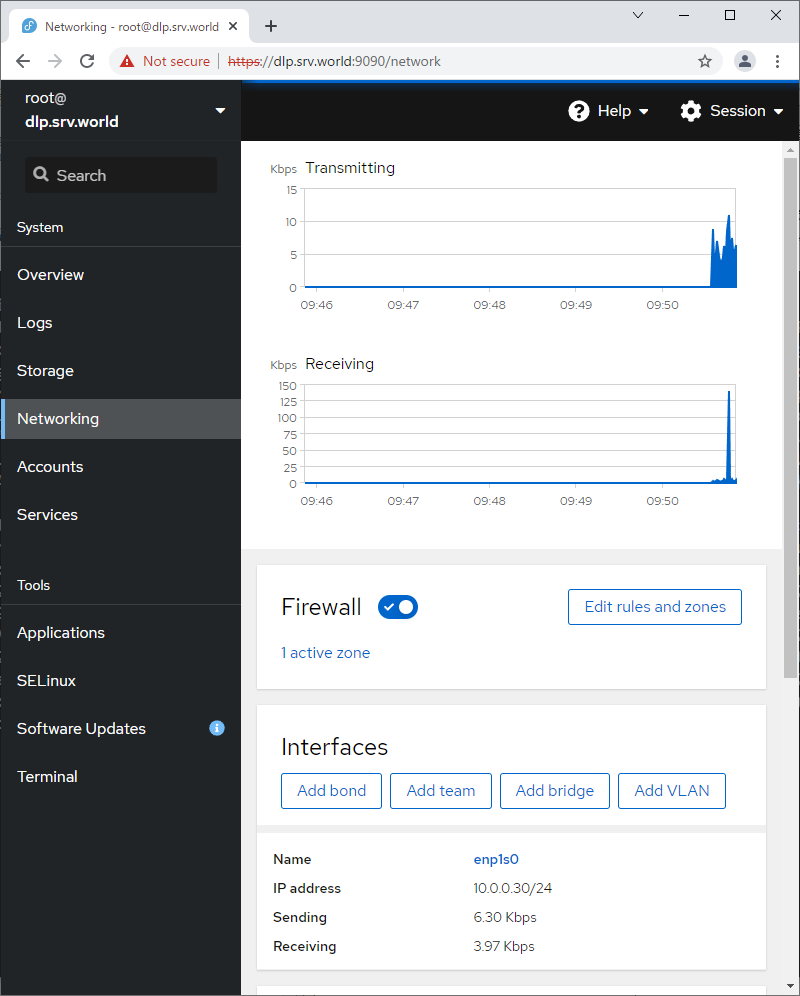
| \[5\] | 对于左侧窗格中的\[网络\],可以管理或操作网络设置。 |
|  |
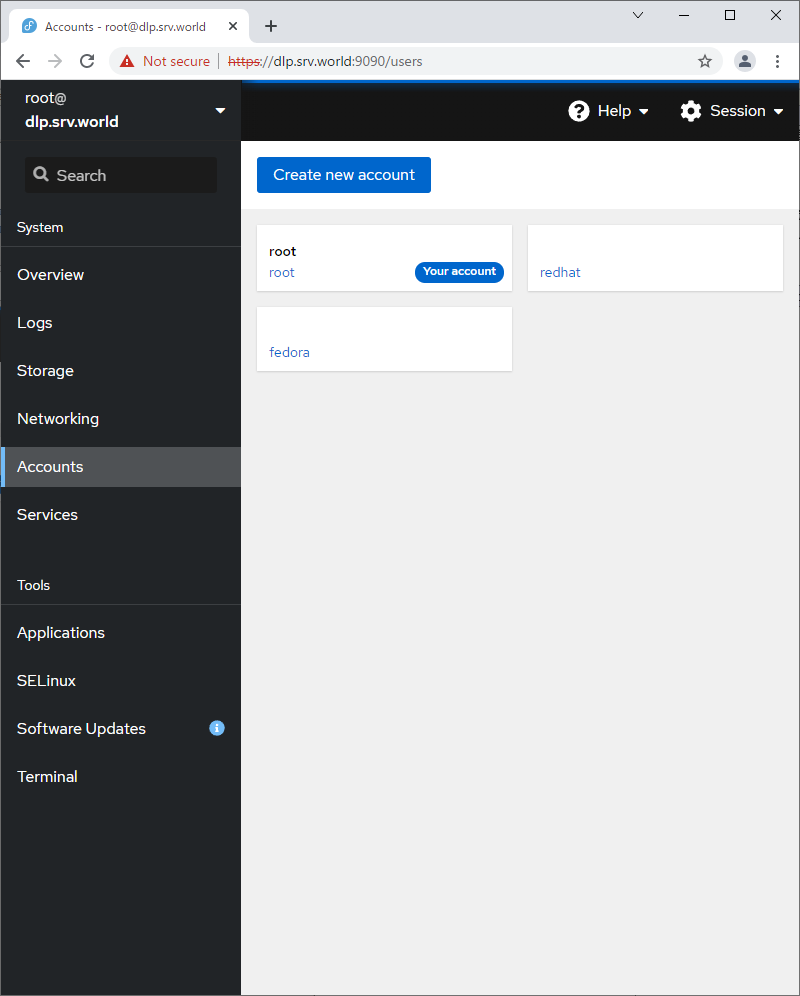
| \[6\] | 在左侧窗格中的\[Accounts\],可以管理或操作系统帐户。 |
|  |
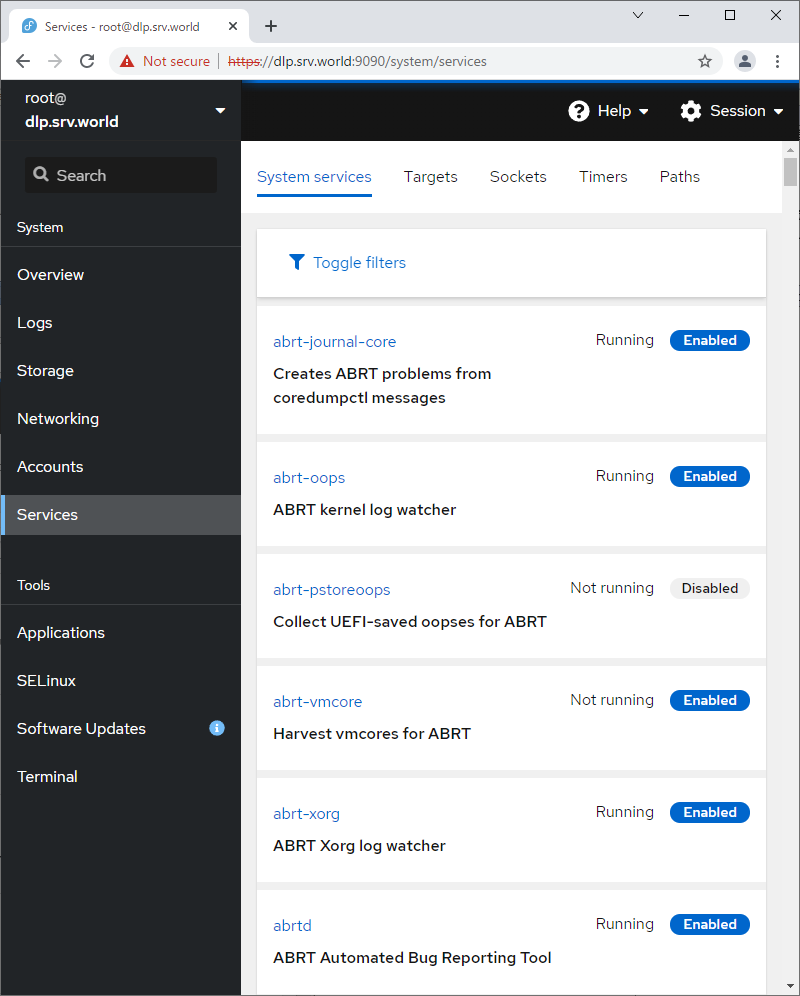
| \[7\] | 左侧窗格中的\[服务\],可以管理或操作系统服务。 |
|  |
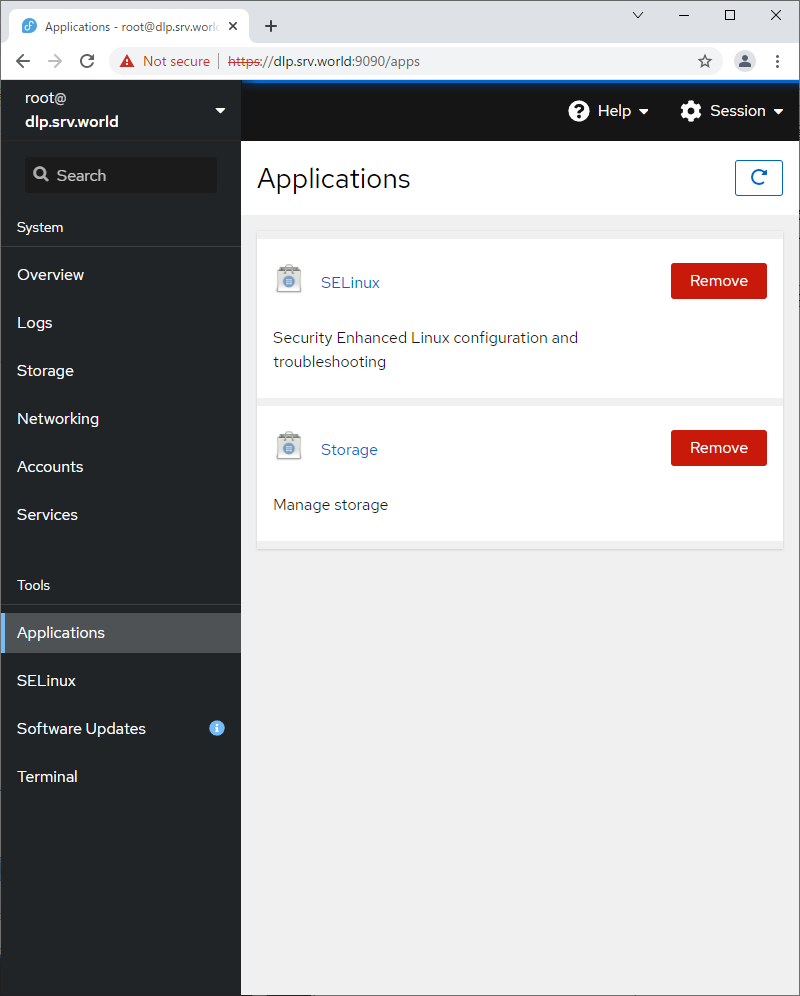
| \[8\] | 对于左侧窗格中的 \[应用程序\],可以安装或删除应用程序。 |
|  |
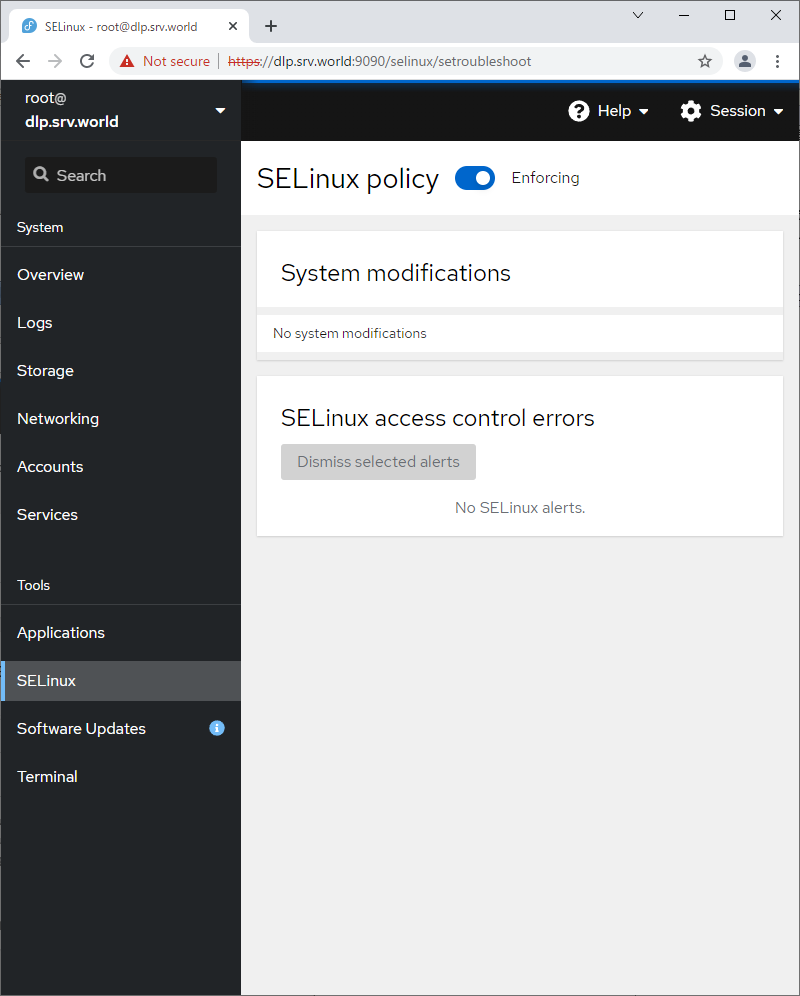
| \[9\] | 对于左侧窗格中的 \[SELinux\],可以查看 SELinux 警报日志。(基于 SELinux 启用状态) |
|  |
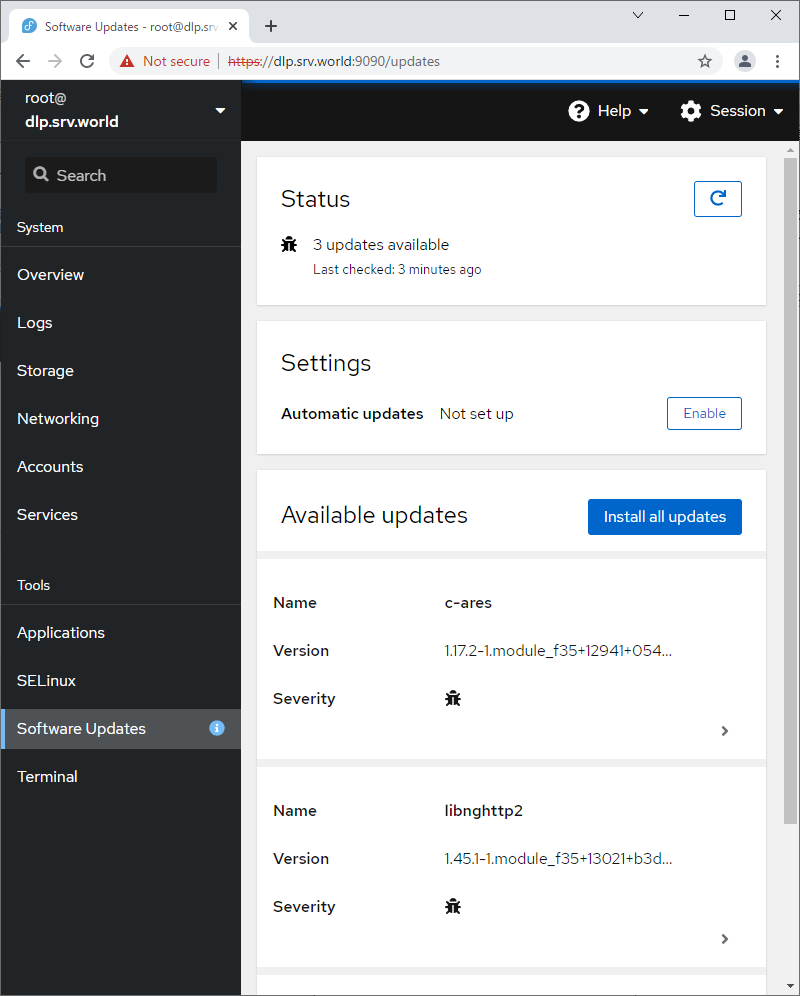
| \[10\] | 对于左侧窗格中的 \[软件更新\],可以确认更新或运行更新包。 |
|  |
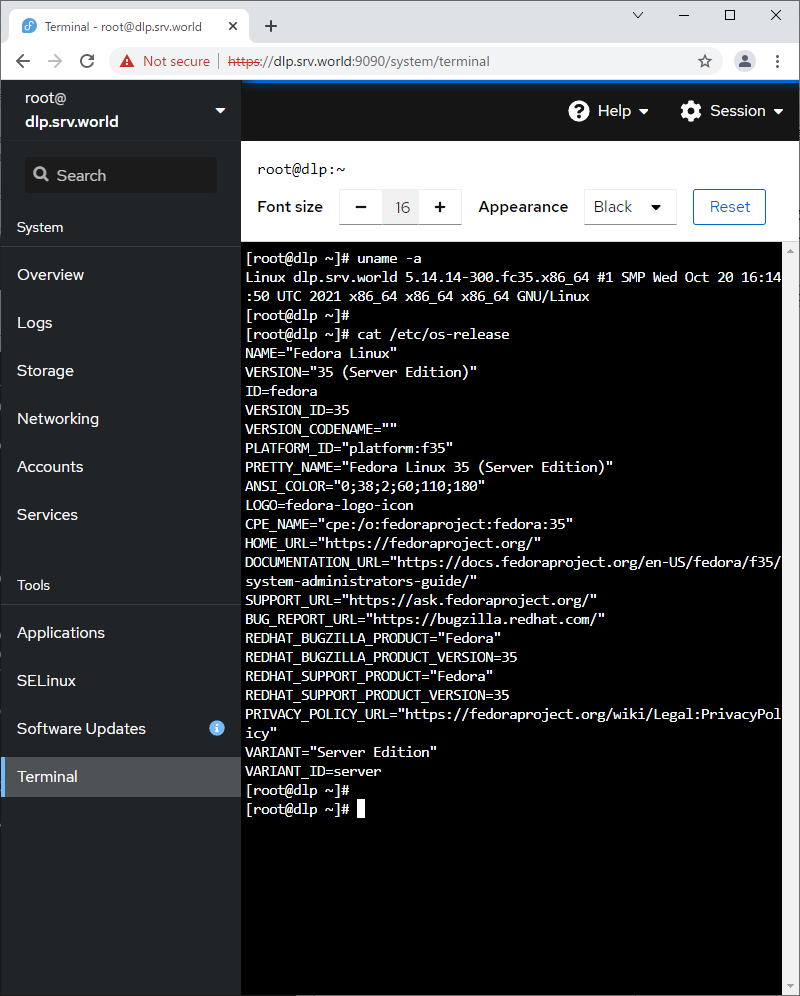
| \[11\] | 对于左侧窗格中的\[终端\],可以直接使用命令操作系统。 |
|  |
|  |
|  |
|  |
|  |
|  |
|  |
|  |
|  |
|  |
|  |
| 选项 | 描述 |
| 读写 | 允许 NFS 卷上的读取和写入请求。 |
| 罗 | 仅允许 NFS 卷上的读取请求。 |
| 同步 | 仅在将更改提交到稳定存储后才回复请求。(默认) |
| 异步 | 此选项允许 NFS 服务器违反 NFS 协议并在请求所做的任何更改提交到稳定存储之前回复请求。 |
| 安全的 | 此选项要求请求源自小于 IPPORT\_RESERVED (1024) 的 Internet 端口。(默认) |
| 不安全 | 此选项接受所有端口。 |
| 延迟 | 如果怀疑另一个相关的写入请求可能正在进行中或可能很快到达,则稍微延迟将写入请求提交到磁盘。(默认) |
| no\_wdelay | 如果还设置了异步,则此选项无效。如果 NFS 服务器怀疑另一个相关的写入请求可能正在进行中或可能很快到达,它通常会稍微延迟向磁盘提交写入请求。这允许通过一个可以提高性能的操作将多个写入请求提交到磁盘。如果 NFS 服务器主要接收小的无关请求,则此行为实际上会降低性能,因此可以使用 no\_wdelay 将其关闭。 |
| 子树检查 | 此选项启用子树检查。(默认) |
| no\_subtree\_check | 此选项禁用子树检查,这具有轻微的安全隐患,但在某些情况下可以提高可靠性。 |
| root\_squash | 将请求从 uid/gid 0 映射到匿名 uid/gid。请注意,这不适用于可能同样敏感的任何其他 uid 或 gid,例如用户 bin 或组人员。 |
| no\_root\_squash | 关闭根挤压。此选项主要用于无磁盘客户端。 |
| all\_squash | 将所有 uid 和 gid 映射到匿名用户。对于 NFS 导出的公共 FTP 目录、新闻假脱机目录等很有用。 |
| no\_all\_squash | 关闭所有挤压。(默认) |
| anonuid=UID | 这些选项显式设置匿名帐户的 uid 和 gid。此选项主要用于 PC/NFS 客户端,您可能希望所有请求都来自一个用户。例如,考虑下面示例部分中 /home/joe 的导出条目,它将所有请求映射到 uid 150。 |
| anongid=GID | 阅读上文(annuid=UID) |
| 王牌类型 | |
| 一种 | A = Allow :表示允许访问。 |
| D | D = Deny :表示拒绝访问。 |
| 王牌标志 | |
| d | Directory-Inherit :新的子目录继承相同的 ACE。 |
| F | File-Inherit :新文件继承相同的 ACE 但不继承继承标志。 |
| n | No-Propogate-Inherit :新的子目录继承相同的 ACE 但不继承继承标志。 |
| 一世 | Inherit-Only :新文件/子目录继承相同的 ACE,但该目录没有 ACE。 |
| 王牌校长 | |
| (USER)@(NFSD 域) | 普通用户 对于 \[NFSDomain\],它只是为 \[idmapd.conf\] 中的 \[Domain\] 值指定的域名。 |
| (GROUP)@(NFSD 域) | 公共组 对于组,像这样指定 \[g\] 标志 ⇒ A:g:GROUP@NFSDomain:rxtncy |
| 所有者@ | 特别负责人:业主 |
| 团体@ | 特别负责人:集团 |
| 每个人@ | 特约校长:大家 |
| ACE 权限 | |
| r | 读取文件数据/列出目录中的文件 |
| w | 将数据写入文件/在目录中创建新文件 |
| 一种 | 将数据附加到文件/创建新的子目录 |
| X | 执行文件/更改目录 |
| d | 删除文件或目录 |
| D | 删除目录下的文件或子目录 |
| 吨 | 读取文件或目录的属性 |
| 吨 | 将属性写入文件或目录 |
| n | 读取文件或目录的命名属性 |
| ñ | 写入文件或目录的命名属性 |
| C | 读取文件或目录的 ACL |
| C | 写入文件或目录的 ACL |
| ○ | 更改文件或目录的所有权 |
| ACE 权限别名 | 对于使用 nfs4\_setfacl,可以为 ACE 权限使用别名 |
| R | R = rntcy:通用读取 |
| W | W = watTNcCy :通用写入 |
| X | X = xtcy:通用执行 |
| \[1\] | 安装所需的软件包。 |
| \[2\] | 为KVM虚拟机配置Bridge网络。 为您自己的环境替换接口名称\[enp1s0\]。 |
| \[1\] | 安装Podman。 |
| \[2\] | 下载官方图像并创建一个容器,并在容器内输出单词\[欢迎来到Podman World\]。 |
| \[3\] | 使用如下所示的\[i\]和\[t\]选项连接到容器的交互式会话。 如果从容器会话\[退出\],容器的过程将结束。 |
| \[4\] | 如果您想将容器作为守护进程运行,请添加\[d\]选项。 |
| \[1\] | 安装FreeIPA软件包。 |
| \[2\] | 设置具有集成DNS功能的FreeIPA服务器。 |
| \[3\] | 获取Kerberos门票。 |
| \[4\] | 如果防火墙正在运行,请允许服务。 |
| \[1\] | 安装Apache httpd。 |
| \[2\] | 配置httpd。将服务器名称替换为您自己的环境。 |
| \[3\] | 如果防火墙正在运行,请允许HTTP服务。HTTP使用80/TCP。 |
| \[4\] | 创建HTML测试页面,并使用网页浏览器从任何客户端计算机访问它。如果显示以下页面,没关系。 |